
I should've known people would have wanted instructions to go with a DIY post. I thought it was pretty straight-forward but anyways hopefully this helps you out. If you need anything or have any questions, don't be shy!
What you Need: - Pleather -Tissue Paper -Measuring tape -Scissors -Pins -Sewing Machine

Step 1: Find any kind of pleather (or leather if you're lucky) you like .
You'll need it to measure 26" high, and 23" wide (this can vary depending on how roomy you want the bag to be).

Step 2: I made a prototype first to get the proportions right but you can just use paper
or newspaper to trace the measurements out for yourself. So fold the pleather down so that the fold is at the top and the ends meet at the bottom.
Mesurements:
Handle Width= 4" (Double the size you want the handle to be in the end)
Handle Height= 8"
Distance between handles= 8"-9"

Step 3: Cut it out!
(This is where you could add a pocket if you wanted to. I wanted to keep it as clean as possible so didn't. The problem with if you were to add a pocket is that the seam would be visible from the right side. If this doesn't bother you, go ahead!)

Step 4: Sew down all 3 sides. I stitched them all twice for extra support!

Step 5: Now fold the sides in so that the handles meet/are equal. Use a magazine to keep them in place.

Step 6: Now pin the side flaps, flush with the bottom of the bag and sew!
This creates the "folded-in" look, like real grocery bags. Your flaps should measure approximately 4".


Step 7: Almost done! Now flip the bag over.


Step 8: Now fold in the handles in half towards each other. They should be equal and your entire bag should sit straight. Pin the top part of the handle.

Step 9: Cut up 2 strips of tissue paper and wrap it around the top part of the handle. This will help your sewing machine sew the pleather. I've always had the hardest time working with pleather because of the friction when sewing. Finally I realized how easy it is to get around this issue using tissue paper. The tissue acts as a protection for the pleather, and makes it glide under the machine, just like regular fabric would. Now, just sew a straight line down the width of the handles to keep them in place. Finally, rip the tissue off and you have yourself your very own Jil Sander inspired market bag!
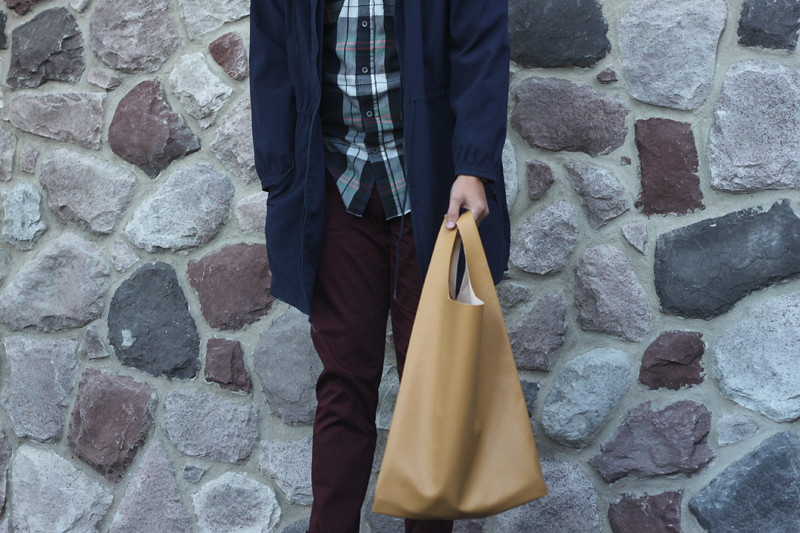 ** Check out Andrew of Pull Teeth's version here
You can also press the sides after you've turned it over (low heat, covered with a towel),
for a more literal look like Andrew did.
i so want to do this! i need a sewing machine first though :') Love your blog! :)
ReplyDeleteLol MAJOR s&m connotations. I wore it to school today and that's the top comment i got. And that pleather trick is so smart! Im working on some mini pleather projects and my sewing machine did not want comply. Totally using your tissue paper trick next time <3
ReplyDeleteawesome blog!
ReplyDelete